First things first...
Some of these links are affiliate links, which means when you click on them, I may receive a small commission when you purchase the product! How cool is that? You get the product and also support my business, which then allows me to keep bringing you more free content (and maybe a little wine money too). I ONLY RECOMMEND products that I have personally used and love. Thank you so much for your support!
Some of these links are affiliate links, which means when you click on them, I may receive a small commission when you purchase the product! How cool is that? You get the product and also support my business, which then allows me to keep bringing you more free content (and maybe a little wine money too). I ONLY RECOMMEND products that I have personally used and love. Thank you so much for your support!
Everyone looks at these beautiful pictures and ideals of perfectly curated homes and all the stay at home, cozy, homesteading vibes. How can you get that feel when you simply don’t have time?
Speaking of time, you can skip to the recipe here.
Look, this isn’t a knock at SAHM’s. It’s a hard job. So is being a working mom and still having these healthy, always present expectations that we place upon ourselves because that is what society shows us.
Anyway, we jut had a great rainstorm last night and it’s October 1st as I write this, with my chicken stock simmering on my gas stovetop. I’ve got ALL the fall vibes up in here today. Also, I like to maximize my time because I’m a mom! I don’t have extra hours; I have to get things in where we can fit them in.
Here is my simple and time saving chicken stock recipe.
First to clarify, stock is made from bones and simmered for longer.
Ok, now that that’s out of the way, my first time saving step is this: skip roasting the chicken. Unless you’d already planned on meal prep or happen to roast a chicken last night for dinner, skip it. Go grab a rotisserie chicken from the grocery store. I’m serious!
Next, take the meat off the bones. As much as you can muster or have the patience for. Use it for dinner the night before you make your stock, or make chicken salad for the week, or save it for chicken soup later (that’s what I’ll be doing today).
Then add all of the bones unto a large stock pot. I cant emphasize LARGE stockpot enough. You don’t need anything fancy. If you don’t already have one, try this one from amazon.
Next, add unpeeled carrots cut maybe in half. You just want them to fit. Add celery cut the same way, LEAVES INCLUDED. Seriously, it adds more flavor.
Add crushed garlic, an onion cut in quarters, and whatever fresh or dried spices you prefer. Fresh spices if you have them will add more flavor but this is about ease and saving time right? I used Italian seasoning in this last batch (basil, oregano, rosemary, marjoram, thyme, and sage). I also added 2 bay leaves, peppercorns, garlic powder (yes even with the fresh garlic), add some salt. If you rather add salt to your dishes you make with the stock later you can add less salt or no salt. It depends on your preference and dietary needs.
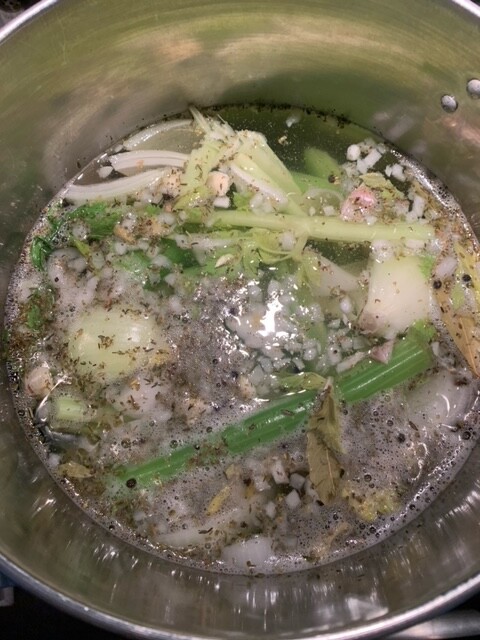
Add water to cover everything and bring it to a boil. Once boiling, reduce to a simmer and allow to simmer for 2 hours or more. The bones should get soft and turn rather gelatinous. When it’s done, strain the stock through a colander and into a container large enough to hold the liquid. I like the large pyrex measuring cups for this.
Allow the stock to cool. Skim off any fat that comes to the top and discard. Then use as needed.
You can store this in the refrigerator for 4-5 days. If I have extra, I put a cup or 2 into zip lock bags, and lay them flat in my freezer to freeze. I do this especially with turkey stock after thanksgiving and then I’m good to go with soup stocks to use all winter long!
Easy Chicken Stock Recipie:
Prep time: 15 minutes
Total time: 3 hours
Ingredients:
- Chicken bones from rotisserie chicken or roasted chicken
- A few stalks of celery (5 or so will do, with leaves)
-4-5 carrots, unpeeled, halved
-1 onion, quartered
-2 bay leaves
-1Tbsp whole peppercorns
- Salt (how much is entirely up to you)
-Fresh garlic (I used 4 cloves)
-Fresh or dried spices. I prefer garlic powder, thyme, rosemary, basil, oregano, and sage. But use what you like!
Directions:
- Add chicken bones to large stock pot
- Add Fresh veggies to stock pot
-Cover with water
-Add fresh and/or dried spices to stock pot
-Bring to a boil
-Reduce to a simmer and cover loosely with lid
-Simmer for at least 2 hours or until bones are gelatinous and stock is a golden yellow color
-Strain off bones and veggies while keeping the stock
-Allow to cool and remove fat from the top with a spoon
-Use in soup immediately or store for future use 4-5 days in refrigerator or freeze
I hope you stay warm and cozy this fall and winter and I hope this recipe helps save you some time while also giving you all the cozy homemade warmth you're craving!
I’m always looking for ways to keep my 4 year old busy, learning, and entertained. Especially right now. I’m currently working from home, playing mom, teacher, biologist, and entrepreneur. Honestly you guys, just typing all of those things out made me tired!
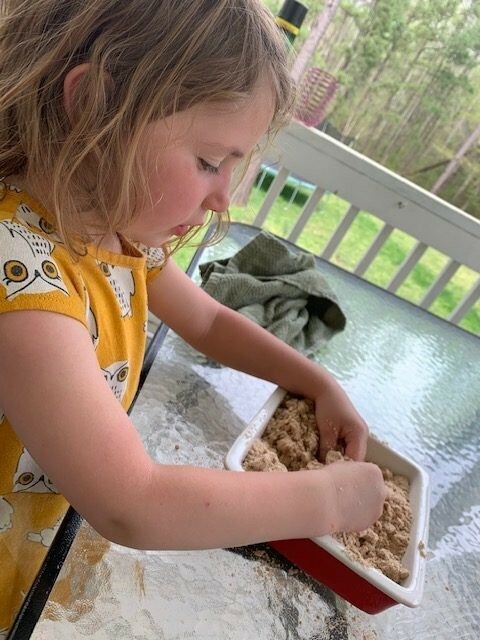
So, I want to share with you this easy DIY “sand” recipe that I made with my daughter today. It's super easy whether you're a total DIY Pinterest mom, an Amazon Prime mom, or somewhere in between. I definitely fall into the in between category. Don't give me something with too many ingredients or too many steps or I'm over it. Ok, on with it...
First, my recommendation is to do this outside if possible, and/or be prepared for some mess. It was however super easy to clean up, and a great sensory activity for her.
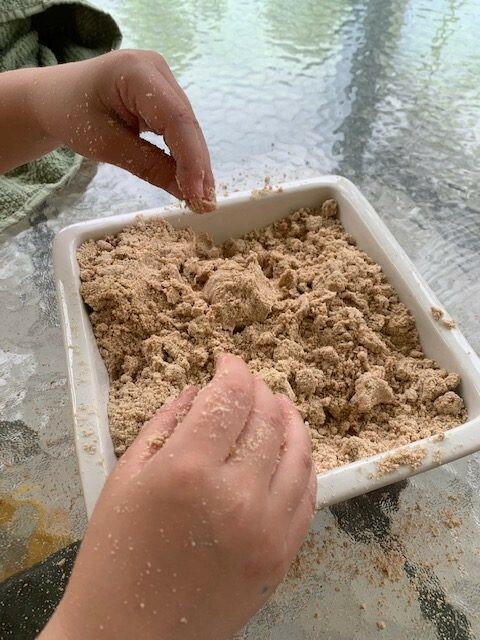
For this play sand you will need:
- A large bowl or pan for mixing and for them to play with the “sand” in. I used a baking dish and it worked perfectly!
- 2 cups flour (I used whole wheat flour because that’s what I had on hand, and it helped it look like actual sand as well – win!).
- 1/4 cup of vegetable oil. I added slightly more to get the right consistency.
- Optional: 2-4 drops of essential oil of your choice.
- Mix, and Play!

Some fun extras we used were a plastic cup to make a “sandcastle”, and play dinosaurs (to knock down said castles, obviously). Allow them to use their imagination!
From making the sand, to playtime, this activity kept my 4 year old occupied for a good hour. Anything garnering that much attention deserves to be shared with the universe! Don't you agree?
Like this content? Join me in the (re)inspired and mindful moms group here.

They’re delicious and kid approved, too.
First things first...
Some of these links are affiliate links, which means when you click on them, I may receive a small commission when you purchase the product! How cool is that? You get the product and also support my business, which then allows me to keep bringing you more free content (and maybe a little wine money too). I ONLY RECOMMEND products that I have personally used and love. Thank you so much for your support!
Some of these links are affiliate links, which means when you click on them, I may receive a small commission when you purchase the product! How cool is that? You get the product and also support my business, which then allows me to keep bringing you more free content (and maybe a little wine money too). I ONLY RECOMMEND products that I have personally used and love. Thank you so much for your support!
I don’t know about you, but some weeks the kids eat a million bananas, and others they’re rotting on the counter. For me, it also seems like I always end up with ONE super ripe banana. Enough to do absolutely nothing with. Sure I could freeze the one to use later, but inevitably I forget, and then I end up tossing it.
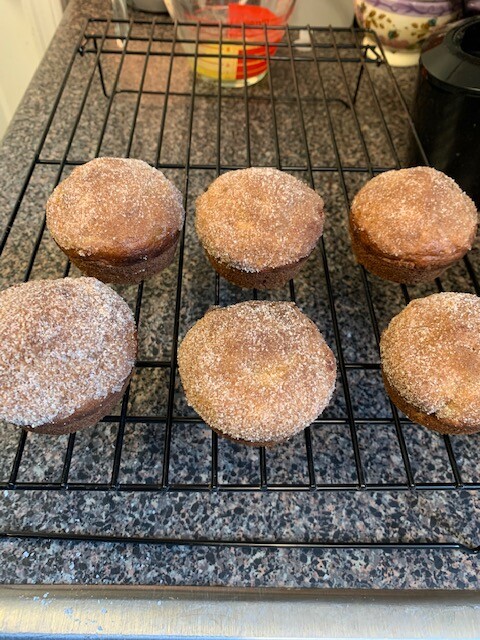
This recipe was super easy, and super delicious and makes about 18 muffins. I think next time I’ll try freezing some of the muffins. This time, my daughter was suddenly starving for banana muffins every five minutes, so they were devoured quickly.
Anyway, let’s get to it.
Ingredients
Banana Muffins:
– 2/3 cup granulated sugar
– 1/2 cup vegetable oil
– 2 large eggs
– 2/3 cups mashed banana (2 small-medium sized bananas)
– 1 teaspoon vanilla extract
– 1 2/3 all purpose flour
– 1 teaspoon baking soda
– 1/2 teaspoon salt
-1/2 teaspoon ground cinnamon
Cinnamon and sugar topping:
– 4 tablespoons butter, melted
– 1/4 cup granulated sugar
– 1/2 teaspoon ground cinnamon
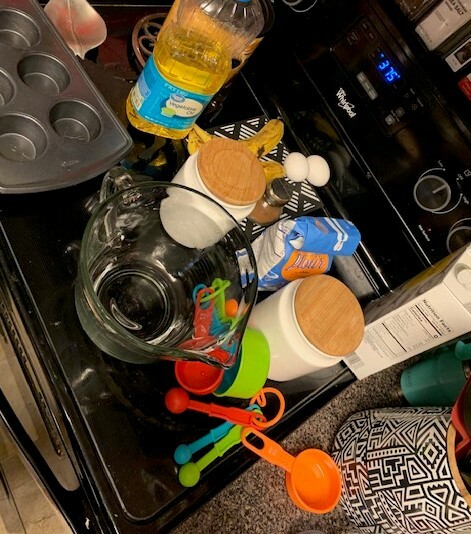
1. Heat oven to 375 degrees. Grease bottoms of 12 regular-size muffin cups with cooking oil or spray. Or you can also use liners.
2. In a medium bowl, combine the sugar, oil, eggs, and stir with a fork or wire whisk. Add in bananas and vanilla, stir until combined.
3. Add in flour, baking soda, salt, and cinnamon. Stir together until just combined.
4. Divide batter evenly among muffin cups (each should be about 3/4 full).
5. Bake for 17 to 21 minutes, or until a toothpick inserted in the center comes out clean and muffins are high and rounded on the top. Another check is to gently press the top of the muffin, it should spring back up when fully cooked.
6. Remove muffins from pan to a cooling rack. You can get the stackable racks I love here.
7. For the cinnamon sugar topping: Combine the sugar and cinnamon in a small bowl. Put melted butter in a separate small bowl. Dip the top of the muffins into the melted butter and then into the cinnamon-sugar. Serve warm, or let cool completely.
8. Store in an airtight container, or place cooled muffins into freezer bags and place into the freezer for longer storage. To thaw, remove from freezer and allow to thaw fully.

If you’re looking to change it up or add a little more spice, add 1 drop cinnamon bark vitality essential oil to the batter or to the bowl cinnamon-sugar topping.
Enjoy!
I’d love your feedback. Contact me below!